
3D printing a custom figure in a day: How to pull off a last minute present with MakeHuman and BlendSwap
Last spring a dear friend of mine got married. We held a bachelor party for him before the wedding. The groom was known as an avid miniature hobbyist and and really into board games, so the theme of the event was woven around that. The person responsible for most of the organizing (huge thanks to him, the party was really lovely) approached me with a special request: Would it be possible to model and print the man of the hour as a board game figurine? The printed model would then be used during the evening in various “quests” which the groom would take part in.
During that time it was really hectic at work. On top of that, the whole corona situation that had been going for almost a year was really starting to get to me. Still this was a really dear friend and the idea was so good that I really wanted to do this. Normally I’d prefer to model this kind of ensemble from scratch, but the bachelor party was less than a week away so a different approach was necessary. I started to look into options for generating a fast human base model. The criteria for selected program was that the mesh would be fast to generate, it would come with a rig and that it would be possible to customize the mesh enough to make it look like the real person. Even better, if all of this would be compatible with Blender. I was also hoping that maybe the program would even come with a clothes library, but I was mentally prepared to either scavenge for free content in the net or, if all else fails, even do a quick roundtrip to Marvelous Designer.
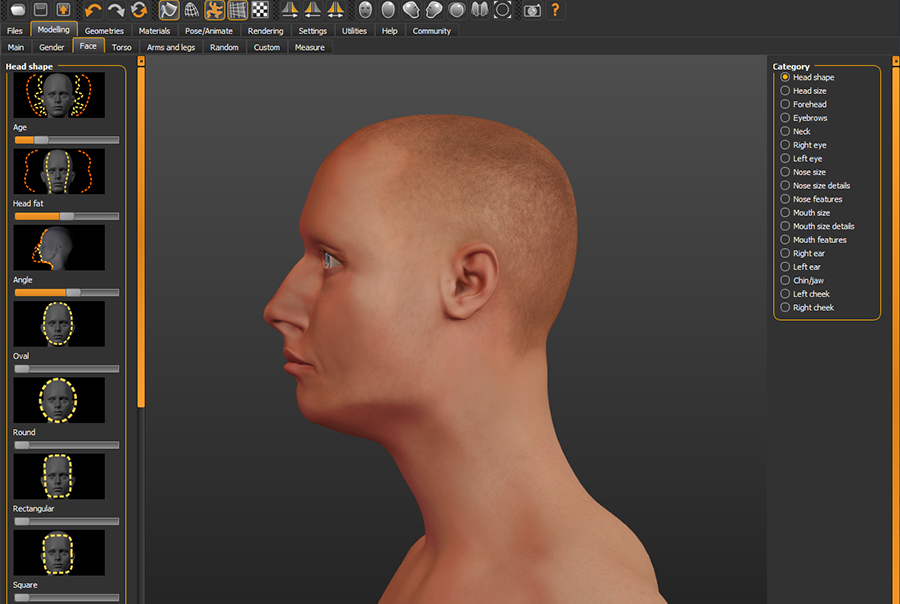
Adjusting facial parametres in MakeHuman
After doing some reading, it seemed that the two best candidates for this project would be MakeHuman and DazStudio. These are both free apps. There were commercial products too like Poser, but for a one-time use case (for the time being at least), they were little bit on the pricey side. Comparing the free options, DazStudio seemed to focus more to posing the character and rendering it with less options for mesh customization. It also felt, that the customization sliders they had were more or less meant to be used with average values and didn’t handle well more drastic values. On the other hand, MakeHuman seemed to have little if any any rendering capabilities and many poses looked bit clumsy, but the mesh customization options were very comprehensive and pleasing. It was especially easier to have different bodytypes in MakeHuman than in DazStudio. It also turned out that MakeHuman was once a plugin for Blender, that evolved into a separate program. It still had an option to bridge directly to Blender, meaning I could modify the character in MakeHuman and it would update instantly in the Blender viewport with full rig and all. This is what sealed the deal for me and I went with MakeHuman.
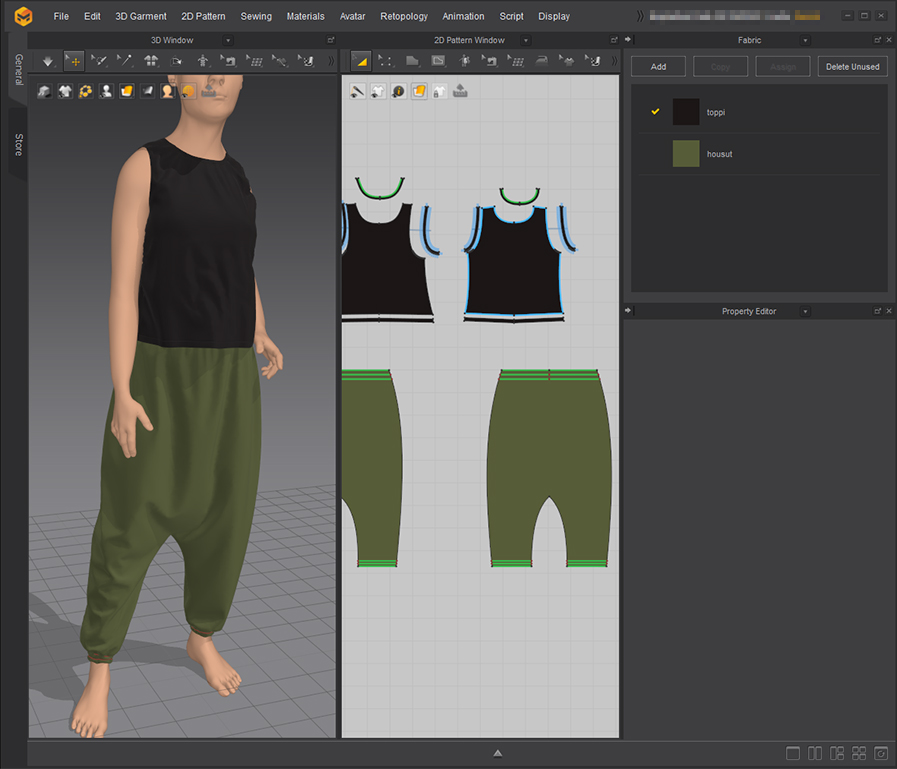
Making quick clothes in Marvelous Designer
Once the basemesh was ready and posed, it was time to put on some clothes. I was following a spesific reference photo for the clothing and the closer it would be matched, the more recognizable the character would be, as that was something of a “signature look” of the real person. There were some free options within MakeHuman, but most of them were texture based and meant for games and frankly the quality left a lot to be desired, so I opened Marvelous Designer and started to craft some quick custom patterns. When the patterns were done I ran a posing simulation where the character went from the A-pose to the printing pose to get the final draping for the clothes. Then I took the clothes to Blender and double-checked everything. The model was dressed now but it was still missing shoes, sunglasses and hair. After browsing Blendswap (which is a collection of free assets provided under the creative commons licenses), I was able to get all of the missing items. The hair took a bit of manual tweaking, but as most of it went under the hat so the visible area that needed tuning was luckily not big. After this I quickly threw together a small custom pedestal, which was the only element that was actually modelled from scratch. The final step was to save a .stl-file and pass it on for printing.
The whole process ended up taking roughly 2 days, give or take one more day for research. Given that a full blown custom model with all of these elements could easily be several weeks of hard work, I think this was a very reasonable compromise. I had a quite pleasant experience with MakeHuman and bringing the character to Blender. The accessories like the shoes and the sunglasses were fairly easy to scavenge for free too. It probably would have been possible to find some readymade clothes from somewhere like Blendswap as well, but it was more of a personal choice to take the extra step with Marvelous Designer as having specific clothing items just was integral part of the model’s visuals.
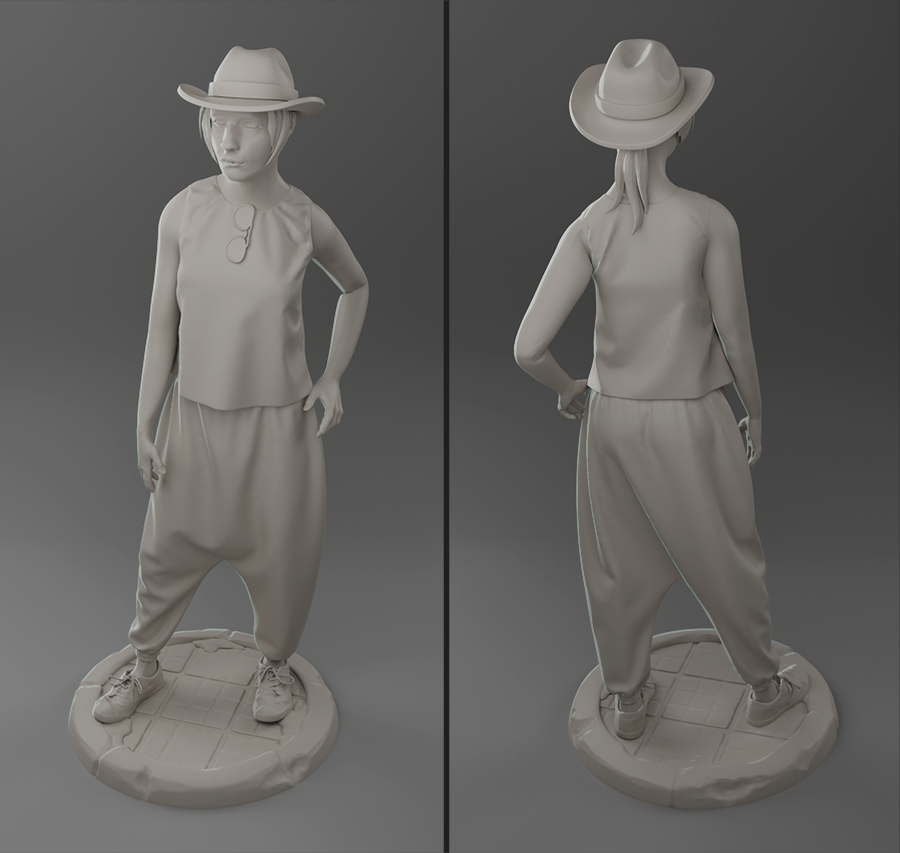
Print ready model rendered in cycles
As I mostly model all of my assets myself, this was definitely an interesting project. 3D printing is such cool technology and there is just something very rewarding about seeing your polygons take tangible shape. Many people I know are curious about printing, but are put off by the learning curve of 3D modelling packages. Applications like MakeHuman seem like they might be a good way to bridge that gap: there is lot you can do without modelling and even more if you can model just a little. Besides the learning curve, sometimes the deadlines just make it impossible to model everything from scratch no matter how badly you wanted to. With shuffling couple of readymade assets around and generating a mesh with sliders I was able meet a very tight deadline without dying- and the excited look on my friend’s face when he saw himself on the gameboard, so completely worth it!