Marvelous Designer: Second batch of hats
Had some more fun with the hats tutorial and rendered rest of the hats. Really good tips there, especially for working with stiff fabrics. Now, off to new adventures!
Had some more fun with the hats tutorial and rendered rest of the hats. Really good tips there, especially for working with stiff fabrics. Now, off to new adventures!
I bought a small tutorial package (by Travis Davids ) about making hats in Marvelous Designer during black friday, and I’ve finally have had some time to try it out. Pretty cool stuff! Especially the crown caught me by surprise, that this kind of item would even be possible. I’m mostly just following along the tutorial, so these probably won’t get posted in the gallery, but I wanted to share a quick pic of them. Didn’t spend that long tweaking the render, which was done with Blender and cycles. The heads in the render are also from the tutorial package. Materials are mostly just colors and normal maps. The shader for the gold and the jewels is from blendswap. There are another 5 hats that I didn’t try yet. Probably going to post a second image when they are crafted.
Last spring a dear friend of mine got married. We held a bachelor party for him before the wedding. The groom was known as an avid miniature hobbyist and and really into board games, so the theme of the event was woven around that. The person responsible for most of the organizing (huge thanks to him, the party was really lovely) approached me with a special request: Would it be possible to model and print the man of the hour as a board game figurine? The printed model would then be used during the evening in various “quests” which the groom would take part in.
During that time it was really hectic at work. On top of that, the whole corona situation that had been going for almost a year was really starting to get to me. Still this was a really dear friend and the idea was so good that I really wanted to do this. Normally I’d prefer to model this kind of ensemble from scratch, but the bachelor party was less than a week away so a different approach was necessary. I started to look into options for generating a fast human base model. The criteria for selected program was that the mesh would be fast to generate, it would come with a rig and that it would be possible to customize the mesh enough to make it look like the real person. Even better, if all of this would be compatible with Blender. I was also hoping that maybe the program would even come with a clothes library, but I was mentally prepared to either scavenge for free content in the net or, if all else fails, even do a quick roundtrip to Marvelous Designer.
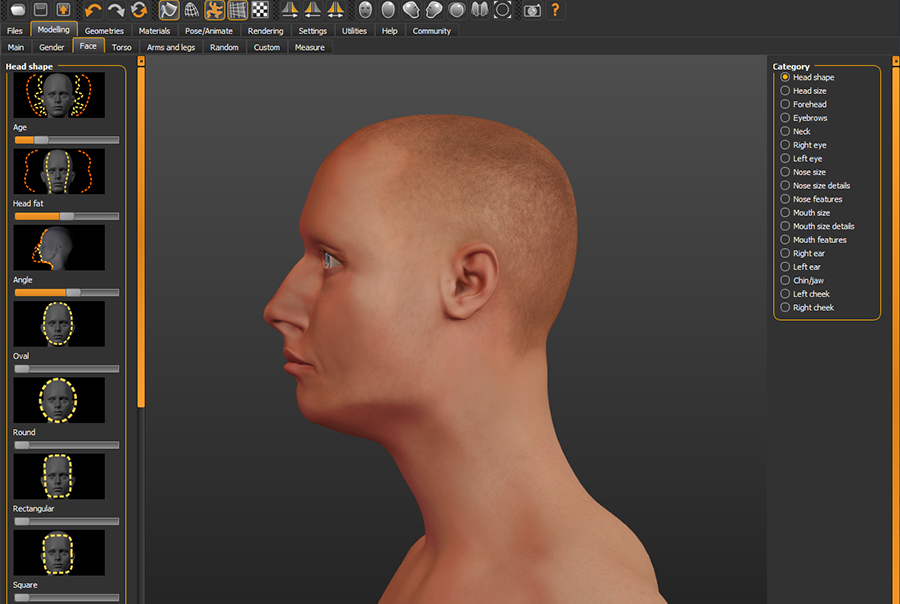
Adjusting facial parametres in MakeHuman
After doing some reading, it seemed that the two best candidates for this project would be MakeHuman and DazStudio. These are both free apps. There were commercial products too like Poser, but for a one-time use case (for the time being at least), they were little bit on the pricey side. Comparing the free options, DazStudio seemed to focus more to posing the character and rendering it with less options for mesh customization. It also felt, that the customization sliders they had were more or less meant to be used with average values and didn’t handle well more drastic values. On the other hand, MakeHuman seemed to have little if any any rendering capabilities and many poses looked bit clumsy, but the mesh customization options were very comprehensive and pleasing. It was especially easier to have different bodytypes in MakeHuman than in DazStudio. It also turned out that MakeHuman was once a plugin for Blender, that evolved into a separate program. It still had an option to bridge directly to Blender, meaning I could modify the character in MakeHuman and it would update instantly in the Blender viewport with full rig and all. This is what sealed the deal for me and I went with MakeHuman.
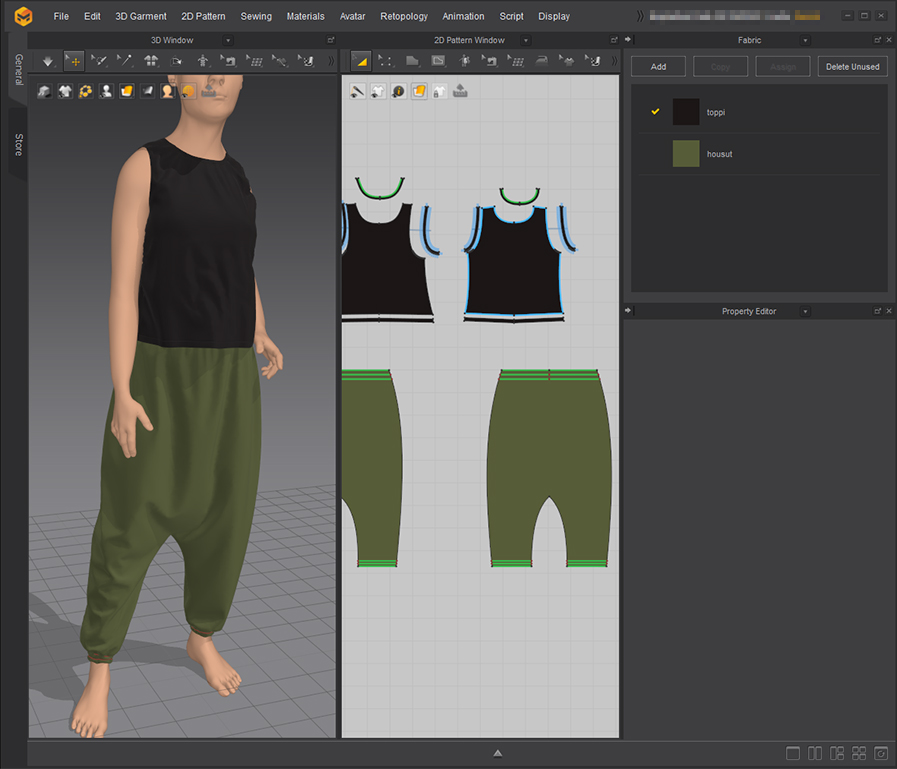
Making quick clothes in Marvelous Designer
Once the basemesh was ready and posed, it was time to put on some clothes. I was following a spesific reference photo for the clothing and the closer it would be matched, the more recognizable the character would be, as that was something of a “signature look” of the real person. There were some free options within MakeHuman, but most of them were texture based and meant for games and frankly the quality left a lot to be desired, so I opened Marvelous Designer and started to craft some quick custom patterns. When the patterns were done I ran a posing simulation where the character went from the A-pose to the printing pose to get the final draping for the clothes. Then I took the clothes to Blender and double-checked everything. The model was dressed now but it was still missing shoes, sunglasses and hair. After browsing Blendswap (which is a collection of free assets provided under the creative commons licenses), I was able to get all of the missing items. The hair took a bit of manual tweaking, but as most of it went under the hat so the visible area that needed tuning was luckily not big. After this I quickly threw together a small custom pedestal, which was the only element that was actually modelled from scratch. The final step was to save a .stl-file and pass it on for printing.
The whole process ended up taking roughly 2 days, give or take one more day for research. Given that a full blown custom model with all of these elements could easily be several weeks of hard work, I think this was a very reasonable compromise. I had a quite pleasant experience with MakeHuman and bringing the character to Blender. The accessories like the shoes and the sunglasses were fairly easy to scavenge for free too. It probably would have been possible to find some readymade clothes from somewhere like Blendswap as well, but it was more of a personal choice to take the extra step with Marvelous Designer as having specific clothing items just was integral part of the model’s visuals.
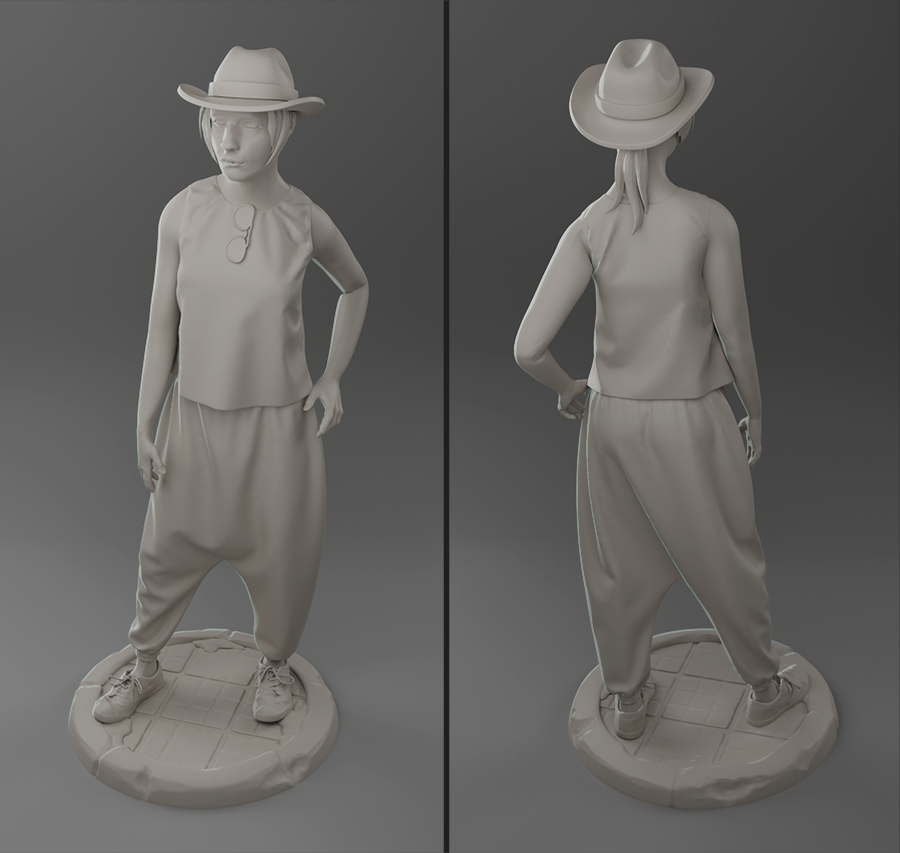
Print ready model rendered in cycles
As I mostly model all of my assets myself, this was definitely an interesting project. 3D printing is such cool technology and there is just something very rewarding about seeing your polygons take tangible shape. Many people I know are curious about printing, but are put off by the learning curve of 3D modelling packages. Applications like MakeHuman seem like they might be a good way to bridge that gap: there is lot you can do without modelling and even more if you can model just a little. Besides the learning curve, sometimes the deadlines just make it impossible to model everything from scratch no matter how badly you wanted to. With shuffling couple of readymade assets around and generating a mesh with sliders I was able meet a very tight deadline without dying- and the excited look on my friend’s face when he saw himself on the gameboard, so completely worth it!
A lesson was learned while documenting these models; One should not postpone it by multiple years.
While being vaguely aware about the pace new content was being produced, it was easy to think that “I’ll get around to it” and it won’t be “much of a hassle” to document them once there was a good time for it.
So, that indistinctly tall, undefined pile of assets turned out to be 145 models. I’m not even kidding. People; document your models as you go, I mean it.
These models were made for Hotel Hideaway by Sulake. The furniture displayed here are or have been available to players either via purchase or collectable crates. They were made between 2019 -2021. It’s bit challenging to recall specific dates for all of them, but some are tied to events like the Valentines Day or Halloween. The models definitely hold a lot of memories. It was even a bit overwhelming to go through all of them at once. Shoutout to Sulake for letting us 3D artists put in all those lighthearted easter eggs. -I hope the players got as many giggles out of them as we did!
Check out the new models here.
The gnome character has finally had a retopo and is fully rigged. I named the model Ilona. She is now fully set up for show in Marvelous Designer. I was trying out if importing animations works properly, which turned out to be handled rather nicely and hassle free in MD . I really liked how they keep all internal data in separate files that can be called upon, so switching the avatar mesh quickly was convenient. I couldn’t figure out yet how to import the rigify-made rig so, that it would be movable in MD (the bones are there, but the hierarchy is garbage after the export, and you cannot edit it internally there), but the animations come through beautifully, so that solution works ok for now.
After everything was set up, I couldn’t resist but to throw on some test clothes on her and do a fast render in Marmoset Toolbag 3. These clothes are just some stuff that that ships with MD, so I just quickly modded the patterns to make them fit. The character needs still some fine tuning, but I’m pretty happy about the recent progress. Next up: some groovy cloth designs and classier renders!
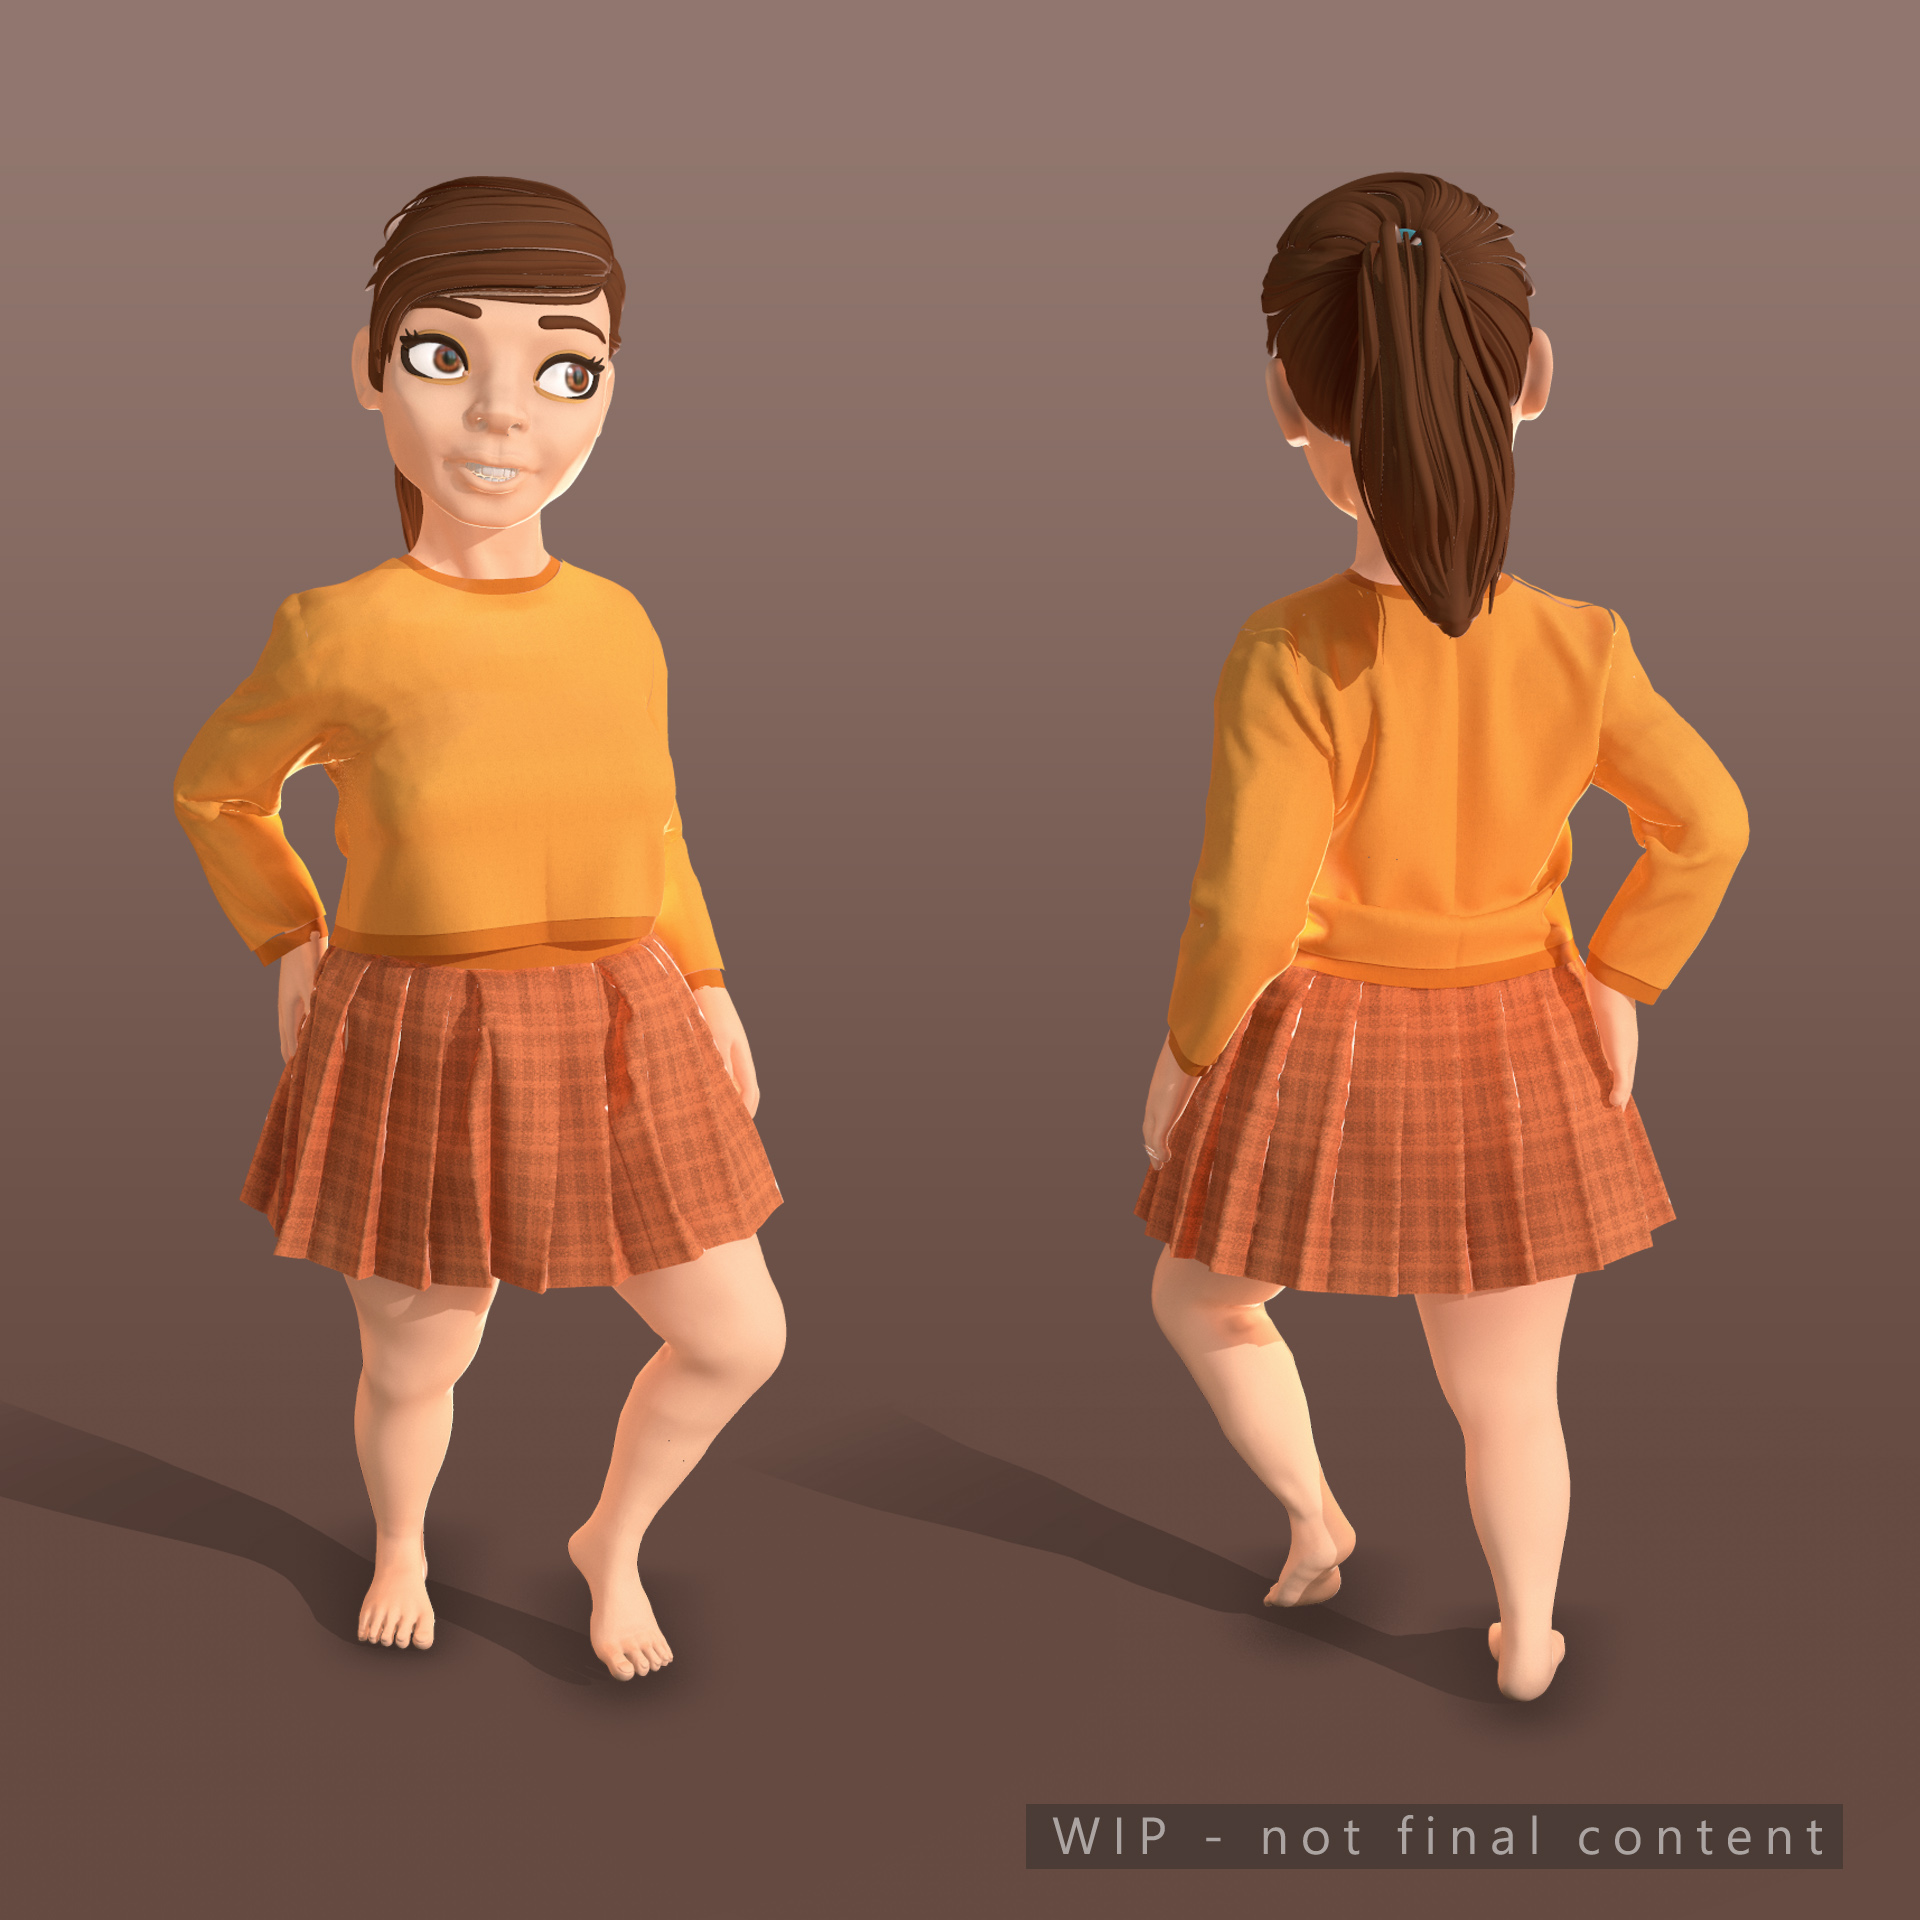
Finally had some spare time to work on this model again. The anatomy was rather heavily adjusted and I made a quick hairdo for her (using Danny Mac’s wonderful tutorial series as a reference – can really recommend those .) In the long run I plan to have multiple hairdos that can be switched on the fly. She still has no rig and was again crudely posed with the Zbrush*s transpose tool. Next up: final adjustments, retopo and a real rig.
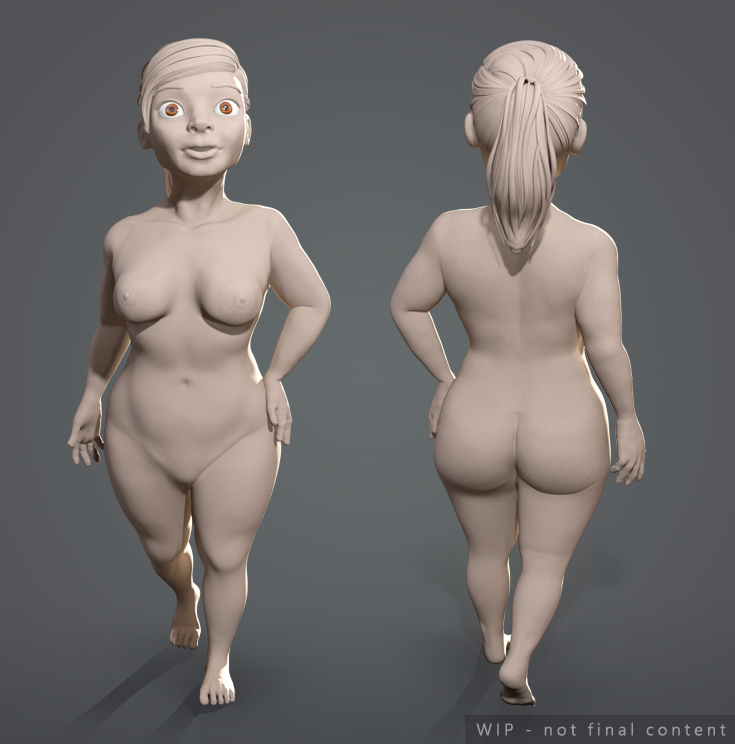
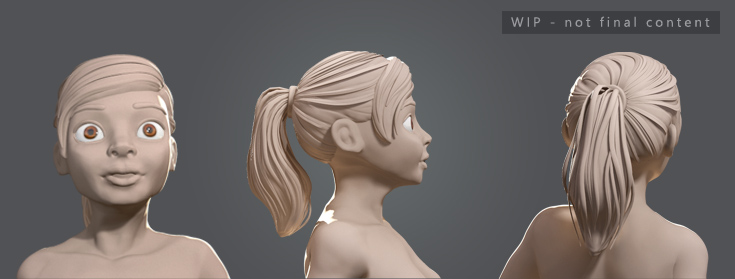
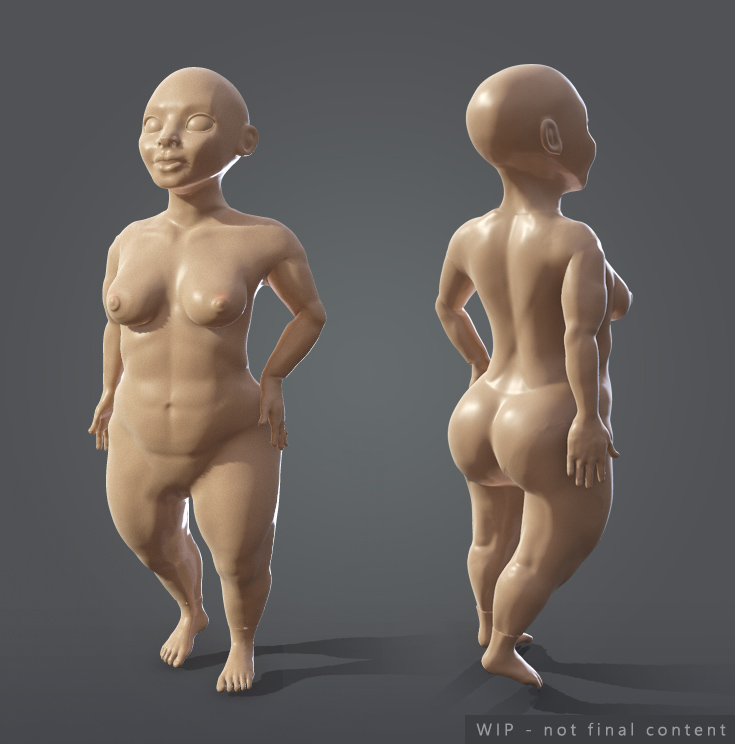
As an incredibly hot summer (that tried to murder everything on it’s path in Europe) fades to a pleasant fall in Helsinki, it’s time to pick up some creative slack. I’ve been toying around with this gnome character in Zbrush. It’s based loosely on one earlier lowpoly figure, but the further I progress, the more vague the reference gets. The original goal was to make a quick mannequin and then dress it up in Marvelous Designer, but the emphasis has shifted ever so slightly into it being Zbrush anatomy piece. The dress-up phase is still coming though.
Right now I’m somewhat happy with the main shapes. Some in-between areas still require some work and the backside could use a second look. The overall feel is bit too muscular maybe, and could be taken couple of notches more to the cartoony direction. Slowly though things are moving along. The current pose is a very crude and fast mock-up. Joints were dislocated. Things were bent from the wrong places. The final character will have a decent rig.
This piece probably won’t be made into a PBR model, but will be a highpoly showcase instead. Anyway, stay tuned: pretty dresses are coming. 🙂
Here at my house, we Hot Doggety core dev. people have a saying. Translated it goes something like: “Insert dog, receive problem.” This has hit the coder harder than me, although I have definitely had a share of it. Mr. dachshund is somewhat unique creature, whose game behavior and animations needs some careful thinking. But after putting our heads together for quite a while, I feel it’s finally time to say it aloud: Hot Doggety is getting a single player campaign! It’s still very much under works, but I feel like we have made enough process to safely say, that this is happening.
The game will have worlds with different themes, each including their own minimap. Our first world is going have a circus theme. The idea of the campaign is, that dog agility meets twister. Your mission will be to make the dog long enough, that he is doing all the agility obstacles at once. We will have different types of obstacles, like hoops, sticks, tunnels and ramps.
The assets for the first world are done, and we are now experimenting on the game logic. Below is a screenshot of the first ever playable demo. Much needs to be done, but the joy of seeing this slowly coming to life, is giving us an amazing amount of energy. By a great coincidence, it also happens to be that 2018 is the year of the dog in the chinese calendar. We take this as a good omen and press twice as hard to deliver this to our players!
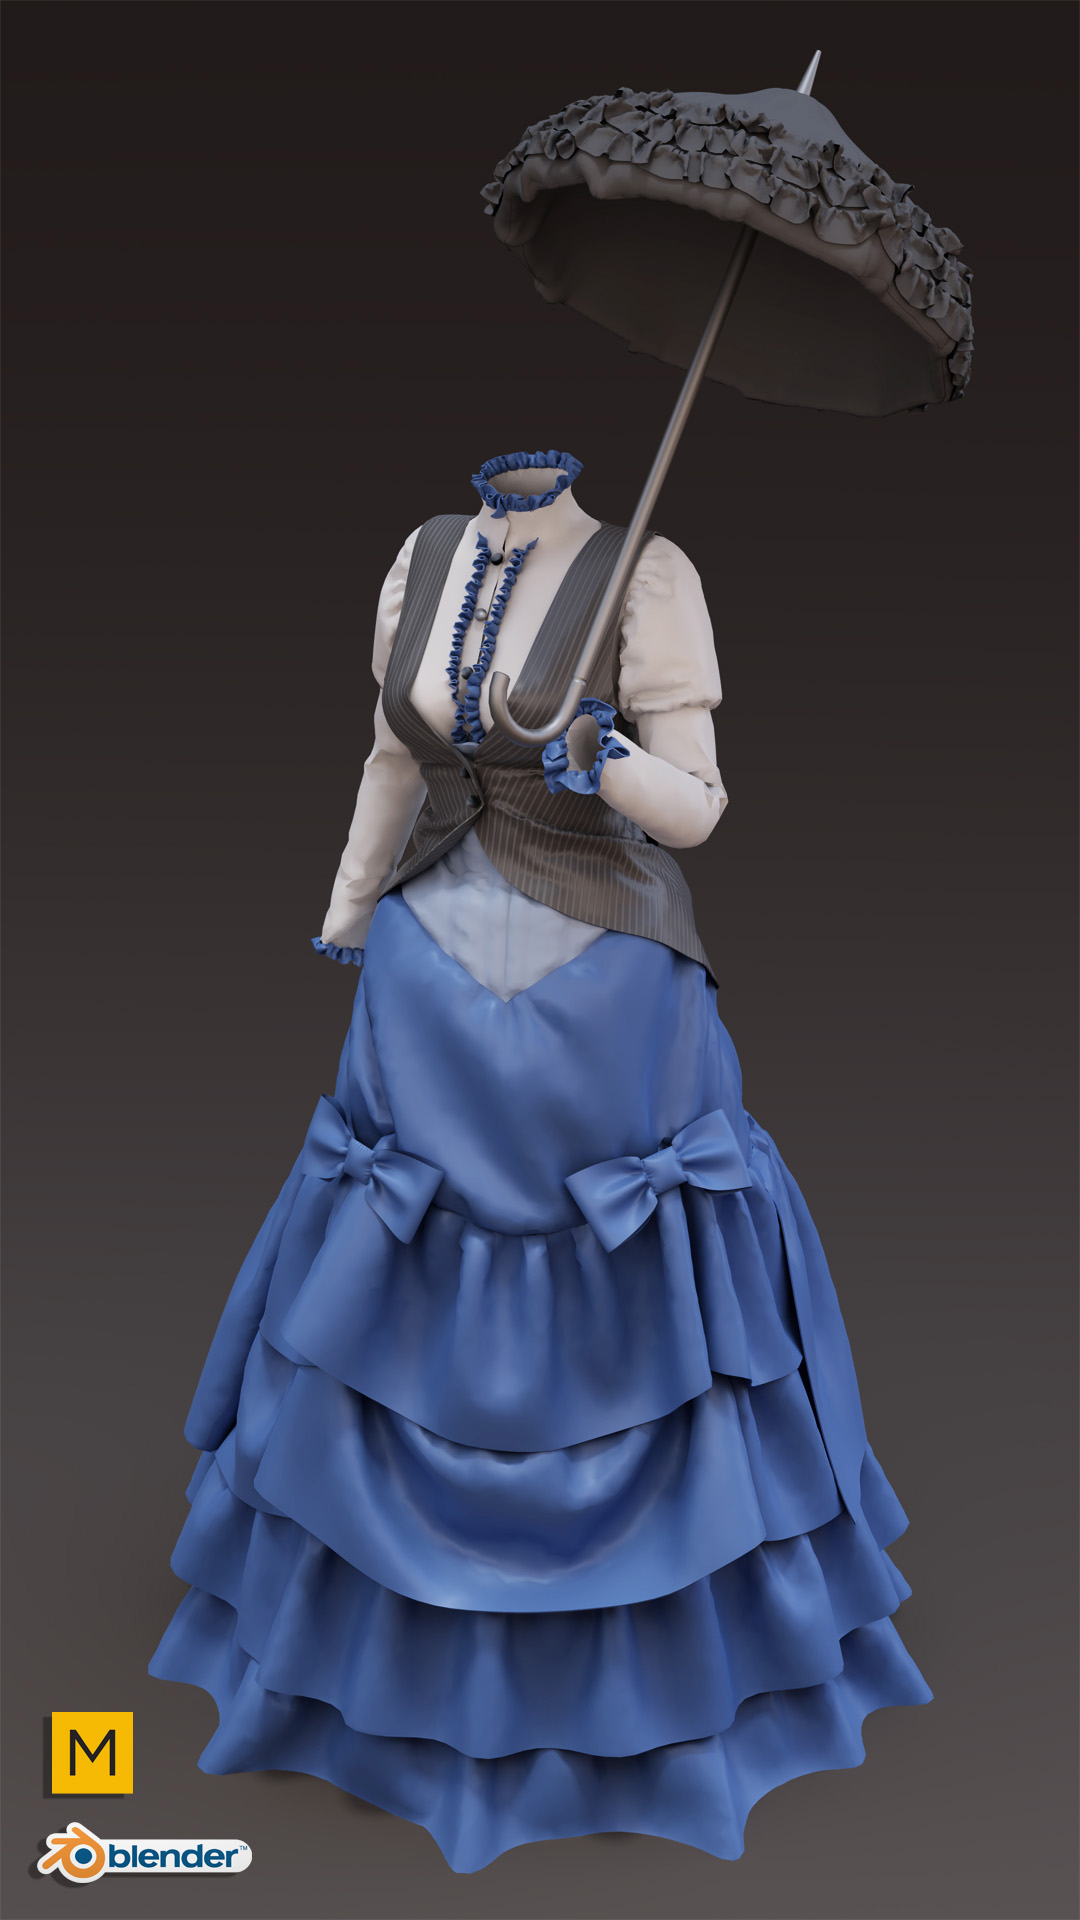
I’m starting to be able to dig deeper into the toolbox in Marvelous Designer. Still little bit intimidated to try my hand with a personal design, I did one more rehearsal from a tutorial. In Pluralsight, they have this wonderful series about creating more complex patterns where they use this victorian inspired dress as a case study. Especially the corset section was very thorough. Here is my final result. Maybe the dress could use a little bit more puff,as the lack of it originated from the bustle cage being slightly narrow, otherwise I’m fairly happy with this. I’m also quite happy about how I’m progressing learning this software. The UI is quite slick and the tool set is smart. There is really only one flaw I have discovered so far: “Take this waltz” from Leonard Cohen won’t stop playing in my head when doing more formal wear like this. But I probably can’t blame Clo software about that one. 😉
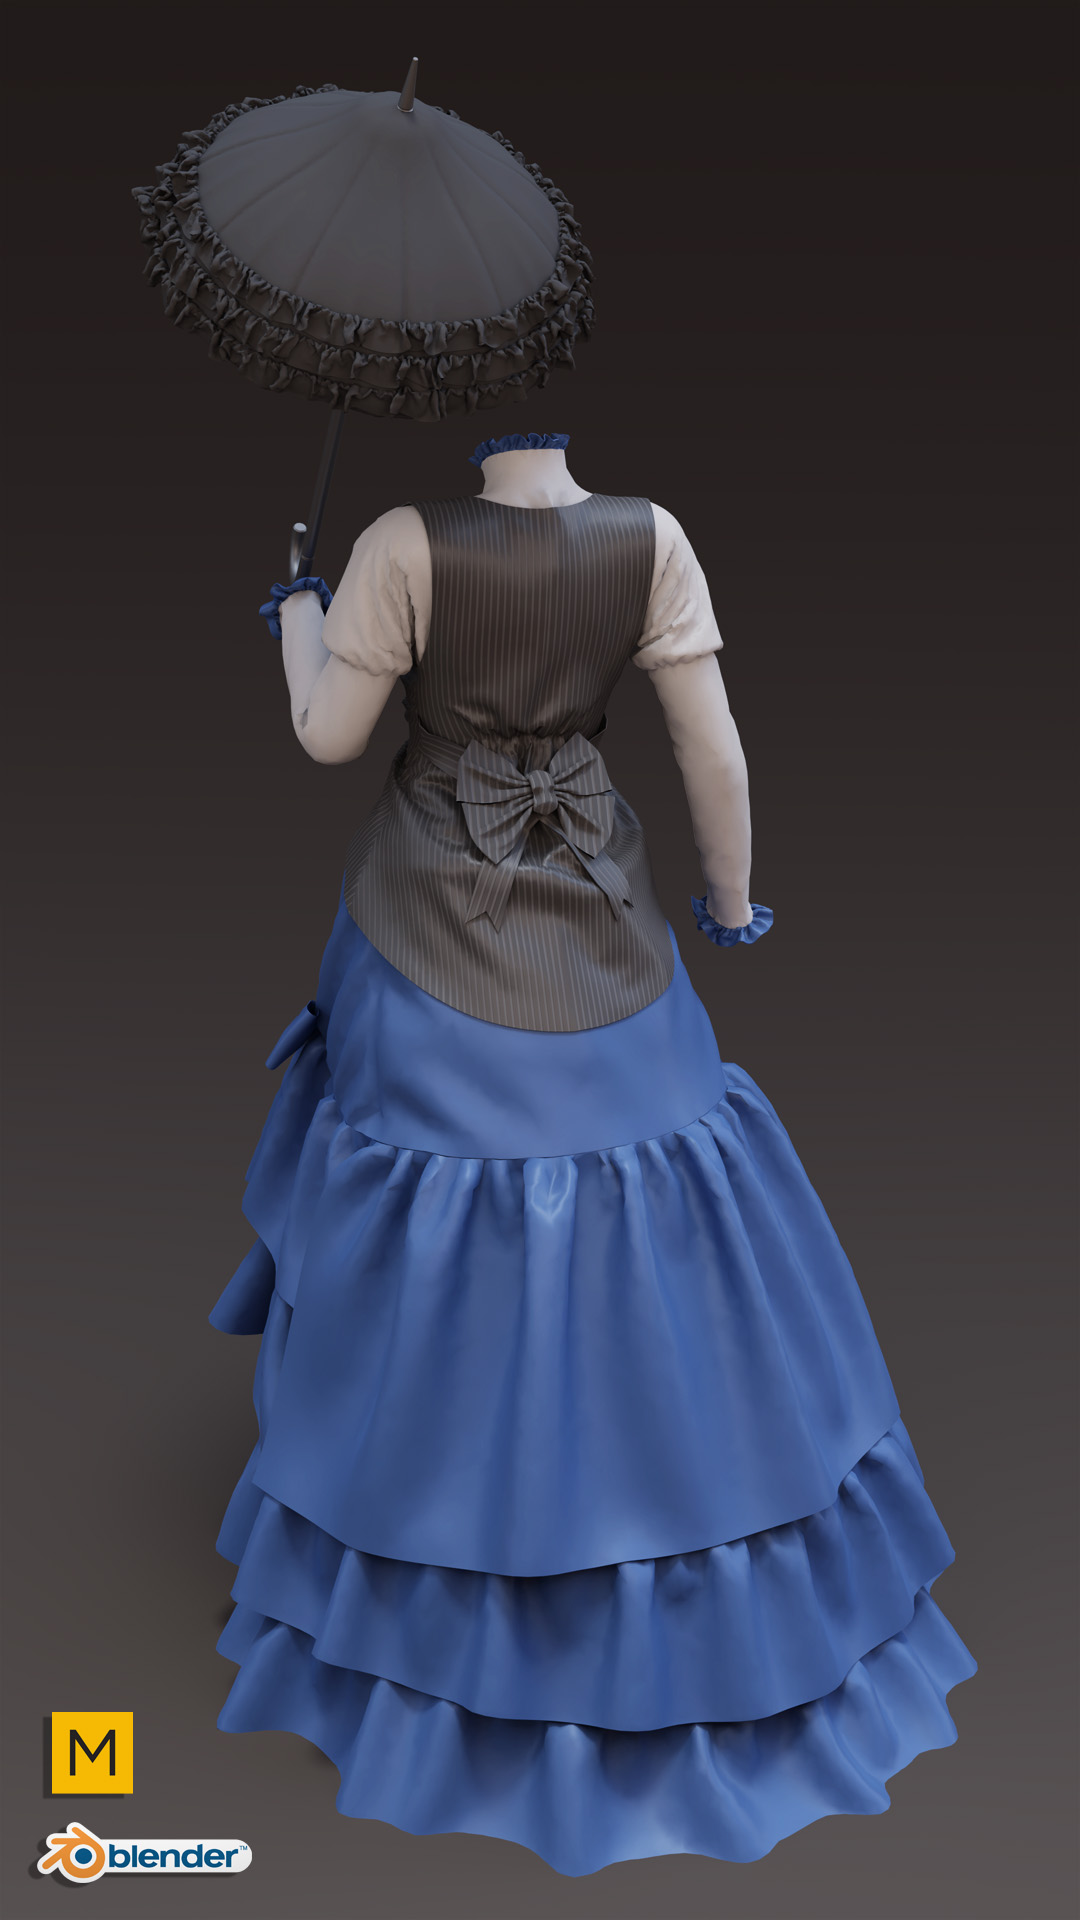
Black friday can be a dangerous time for us artists. Combine that with a credit card, and software can happen (!) Been thinking about it for quite a while now, when I saw Marvelous Designer heavily discounted, I decided it was time to pony up the cash and get this gem. After about a week of training, I’m starting to really understand a bit deeper how the clothes processing works. I absolutely adore this software. As a kid, I was never really into playing with dolls, but now I’m starting to understand, what the fuss was about!
The dress here is a simple practise piece made with a tutorial found from the youtube channel of Clo software. I’m not all that familiar with tailoring and crafting patterns by default, so I thought it might be a good approach to first work through some basic types of clothing, before going for more original content. I’ve got few more of these random items stacked up, just have to get around to rendering some of them.
